
HOW TO BUILT A BICYCLE
step by step
TABLE OF CONTENTS
CONTENT | ||
|---|---|---|
Introduction | Assembling the frame | Assembling the bottom bracket |
Assembling the bicycle wheels | tba | tba |
Insight on building the rim | tba | tba |
Insight on making the hub | tba | tba |
Insight on making the spokes | tba | tba |
INTRODUCTION
How are bicycle made
It doesn’t matter if you are an experienced bicycle production company/wheel builder or a complete beginner, this website will give you all the information, tips and tricks you need to built a bicycle and/or a bicycle wheel.
Bicycle productions has you covered for both wheel building, frame building and making attachments to your main bicycle frame. these section will be split on the website. So if you are only interested in wheel building or only interested in manufacturing a bicycle frame, open the navigation menu in the top right and navigate to your section u would like more information about. You could also use the table of contents.
To give as much information as needed we give both information on hand made building and the easier solutions with machines. So both new builders and experienced corporations have a benefit on reading this article.
New builders that don’t have machines available to them may need to buy some parts. If you plan to buy the rim, hub and spokes and just want to know how to assemble a wheel, start with bicycle wheel assembly
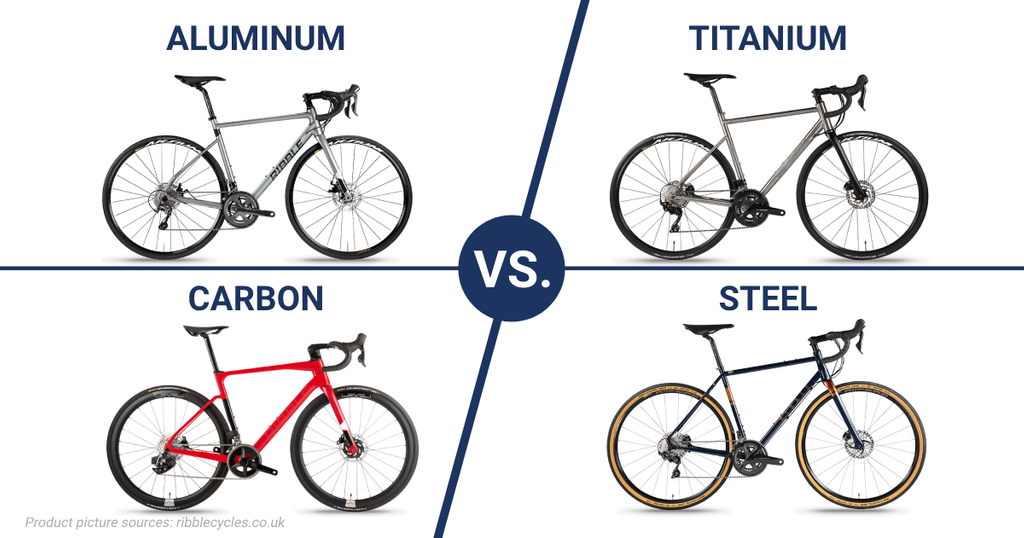
Choosing the right material
When making a bicycle you need to keep your purpose and budget in mind. There are four main material options to choice from, each one of them has pros and cons.
Aluminium, steel, titanium and Carbon, all are strong materials, otherwise u couldn’t make bikes out of them, but which one should you choose? The answer depends on a few questions, like is weight a priority? How much money can u spend? Do you want it to last for 10 years or will you replace it after a few years?
To help you decide what materials you should go for here is a table with the pros and cons.
MATERIAL | PROS | CONS |
|---|---|---|
Alluminium | Cheapest material | Susceptible to damage |
Relatively light | Brittle | |
Steel | Strongest material | Heaviest material |
Resistant to damage | Susceptible to rust | |
Titanium | Best weight to strength ratio | Expensive |
Long lasting | ||
Best aborption for offroad | ||
Carbon | Lightest material | Expensive |
Long lasting | Somewhat brittle | |
Best absorption for road | ||
Very stiff |

BICYCLE WHEELS ASSEMBLY
Building a bicycle wheel consist of deciding materials, the rim, the hub for back and front wheel, the right spokes lengths, nipples, washers, lacing, trueing, applying rim tape, and tyre mounting. You will also need some tooling to get started. The tooling we must use are the Spoke wrench, Trueing Stand, Dish stick and optionally a Tension meter. Some machines replace these toolings and can deliver more accurate and faster production, but those are only for bicycle producers. It is still handy to always have these toolings for testing and small adjustments.
Needed tools
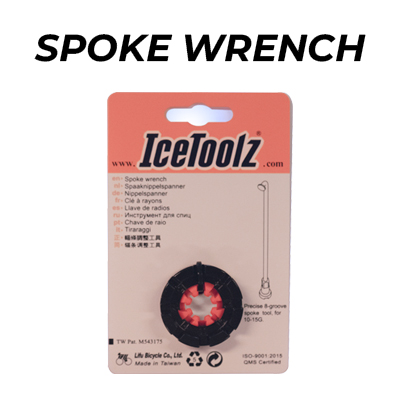

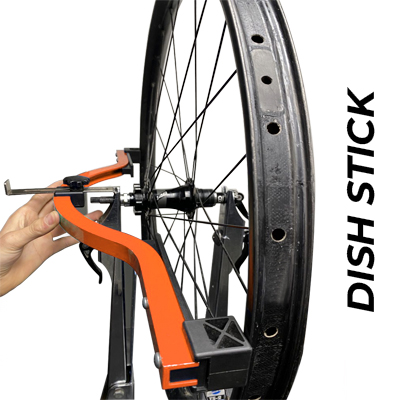
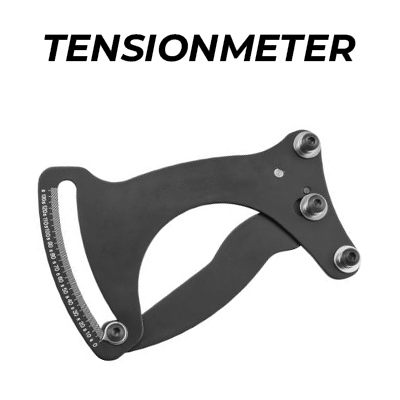
Building a bicycle wheel consist of deciding materials, the rim, the hub for back and front wheel, the right spokes lengths, nipples, washers, lacing, trueing, applying rim tape, and tyre mounting. You will also need some tooling to get started. The tooling we must use are the Spoke wrench, Trueing Stand, Dish stick and optionally a Tension meter. Some machines replace these toolings and can deliver more accurate and faster production, but those are only for bicycle producers. It is still handy to always have these toolings for testing and small adjustments.
After acquiring your rims, hubs, spokes, nipples, washers, tyre and optionally rim tape. we can start assembling the wheel.
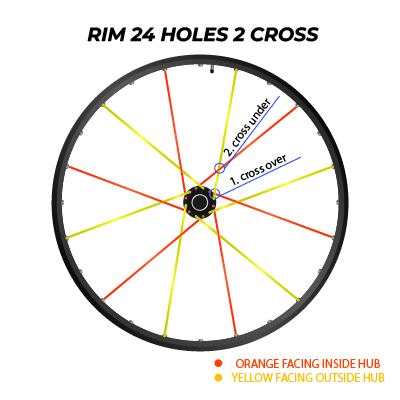
1. The first thing you need to decide is how to lace the rim and hub together with the spokes. There are a few ways to do this, as seen in the pictures about lacing technique. Again if you know the diameter of your rim and hub with the total of holes you can use this tool (spoke calculator) to know what length spokes you need. The Hub needs to have a total that matches with the holes in the rim.
2. We are now going to attach the spokes through the hub. Note that every 2nd hole should be filled with a spoke from the outside of the hub and the other holes should be filled from the inside of the hub. So then you would have spokes that alternately be at the outside and inside of the hub. If you have attached them all, we can start lacing.
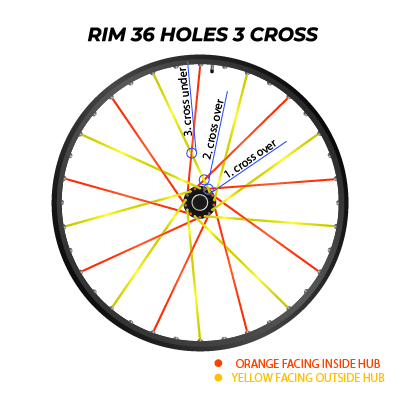
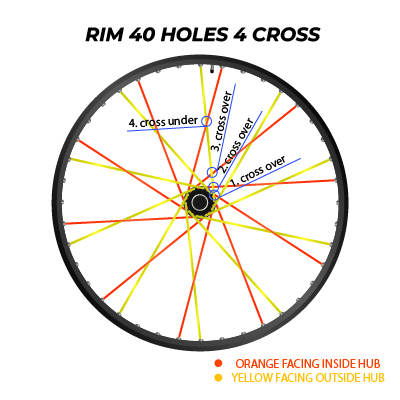
3. The lacing depends on how many holes you have. try to calculate this with the spoke calculator. We have a few ways to lace, 2-cross, 3-cross, 4-cross etc. You start with getting the spoke towards the hole next to the valve, from here you lace every spoke that is facing the outside of the hub. where you lace them depends on the technique, see images on the side. For the spokes facing inside you start on the other side and make the same round. For now don’t tighten them completely. as you need to true the wheel and see if the wheel does not shake when spinning. To make the wheel stable, every spoke needs to have around the same tension.
BICYCLE WHEELS PARTS
Building a bicycle wheel consist of deciding materials, making your wheel cut out, choosing the right hub for the right spokes lengths, lacing, trueing, applying rim tape, and tyre mounting.
Making the rim
The first step in wheel making is the rim. You can either buy one pre-made or make one yourself if you have the machines available to u. If you are going to buy a rim, u can skip this process.
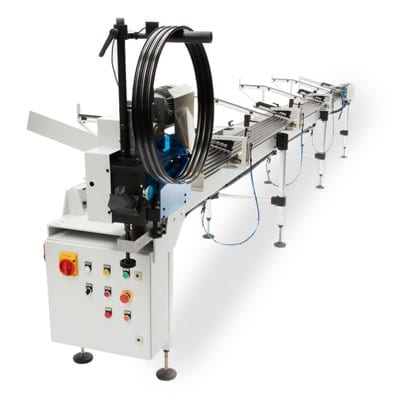
To make one yourself you need an extruded tube of the material of your choosing. To do this by hand would require intense power and precision and is not recommended, instead we are going to use a metal bender.
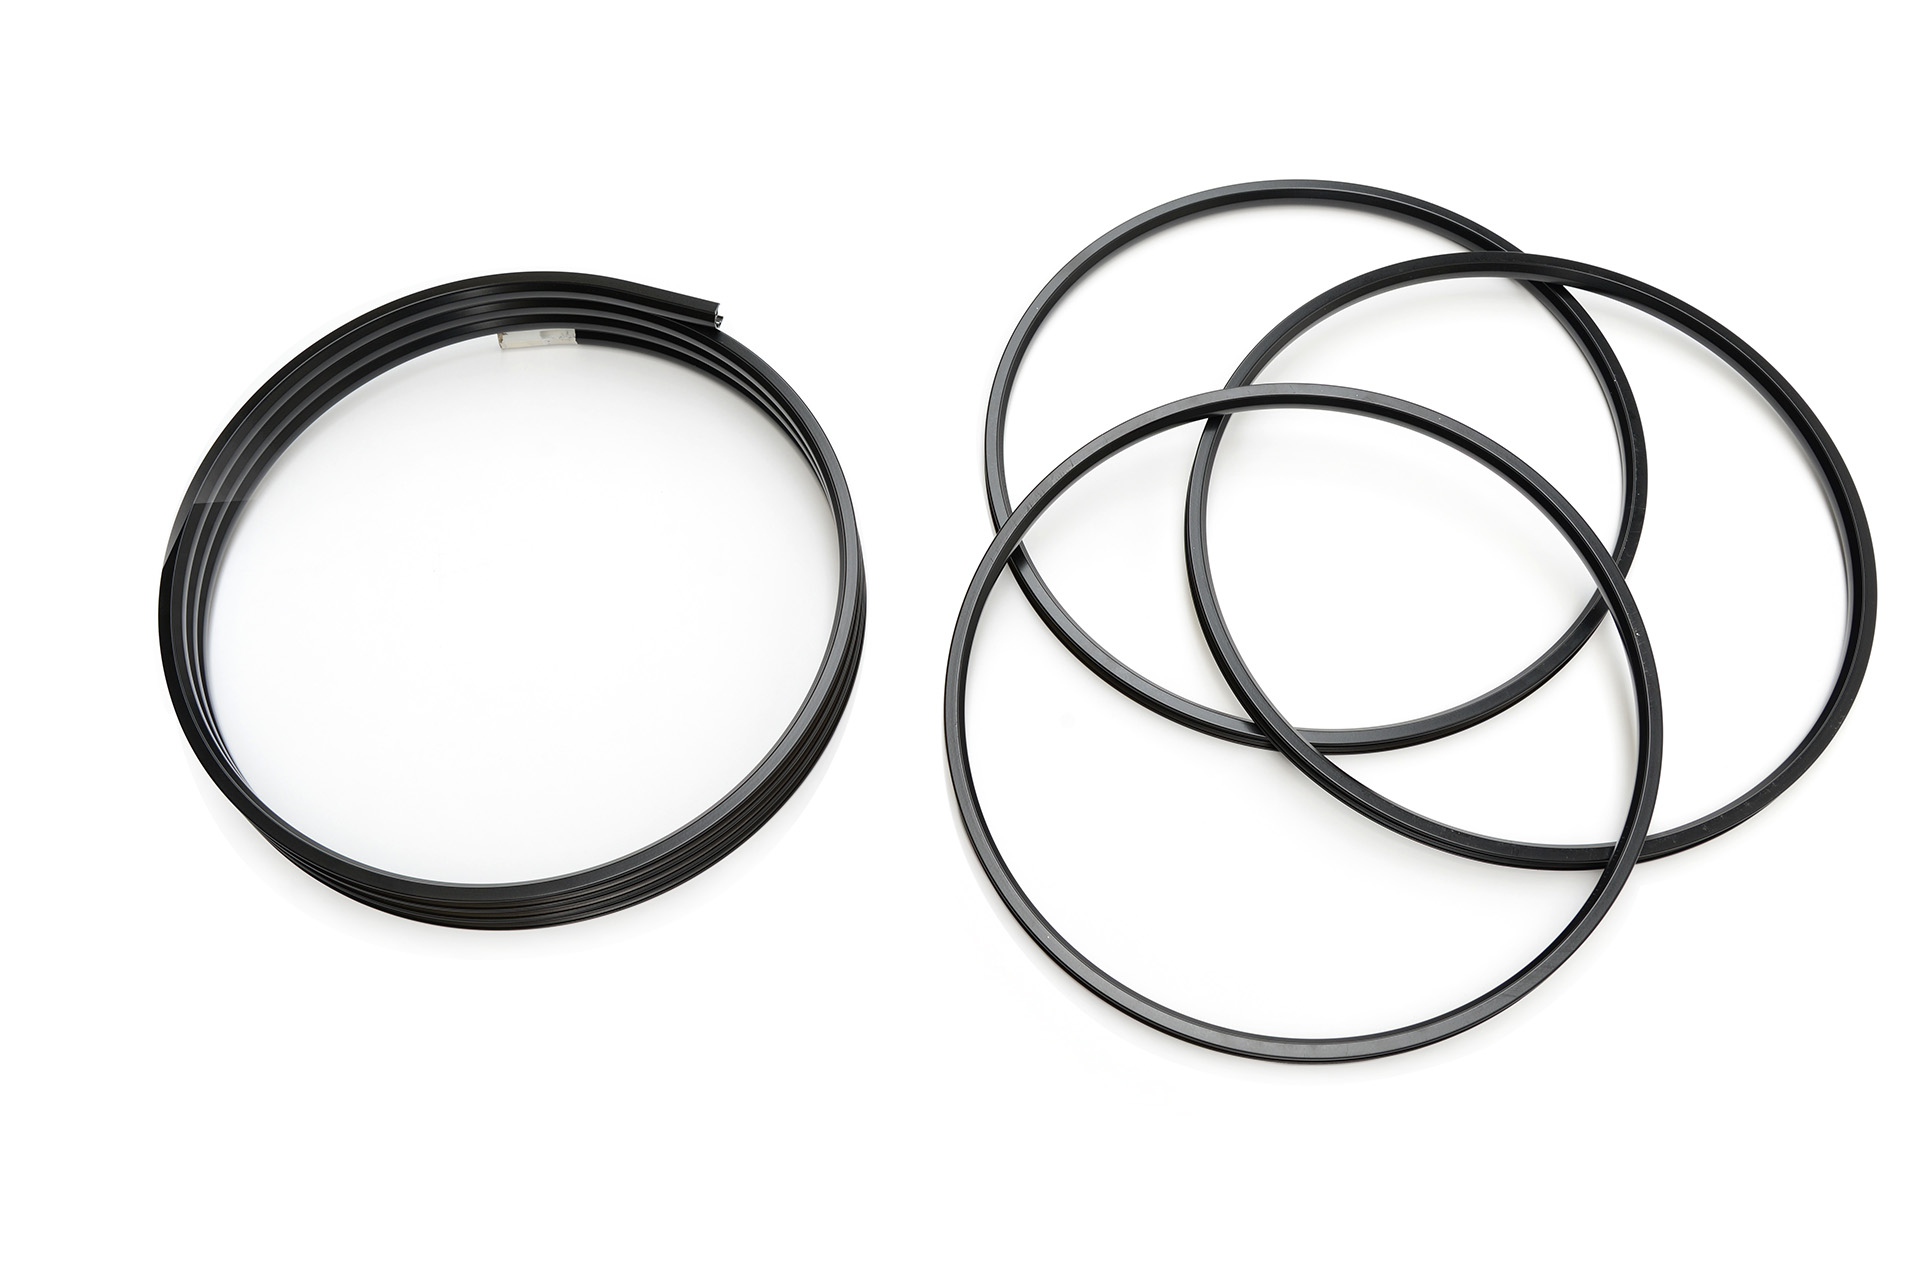
1. Place an extruded tube of the material of your choosing in the metal-bending machine, the machine will bend the metal around 4 times until a coil tube forms of 4 mounted rims.
2. Mount the coil tube onto a cutter, the cutter will separate the 4 rims with a single downward slice. Leaving you with 4 rims with a small cut in the middle. you can also cut it by hand with a metal saw.
3. If you want it coated or in a different colour it is advisable to bathe it in acid. This helps with cleaning dust and contaminants of the rim and apply paint/anti-corrosion coat easier. (*this is optional)
4. Now you weld the rims with the cut together. You do this by either having a meld torch by hand or use a machine specifically designed to meld these rims. You can also choice to pin the rims togheter. after the meld you need to shave the rest of the residue of metal off. this can be done by a hand machine or a machine specifically made for this. This won’t be needed with a pin system.
5. It is time to apply the anti-corrosion paint, this is applied with a electric current in the chemicals bath that has the paint in it. the electric current is used to draw in the coating particles onto the rim and make them attach, giving a nice protective layer. this process is called anodization.
6. A machine shaves off the edges to make the perfect form, this can also be done by hand, but this requires extreme precision, a mistake will bring the wheel out of balance. the machine will almost get 1/3rd of the wheel off to make a perfectly flat surface for the brakes to grip onto.
7. After this a machine drills holes onto the side of the rims so that nipples can be put into them, the nipples function as a hold for the spokes that will be attached later. The machine will have exact measurements of where the nipple holes need to go. This is importent because a slight error could cause the spokes to break if the force difference made of this error is too big. It is also handy because depending of the type of lacing you want to do ( 2cross/ 3cross etc.), the machine can get this done automatically.or pin
A good source for bicycle producers that want to make bicycle rims themselves is Holland mechanics. Holland mechanics has whole machine lines for the production of rims & bicycle wheels of high quality and in practice we have seen that many producers use their machines on a daily basis.
Go to www.hollandmechanics.com
Making the hub
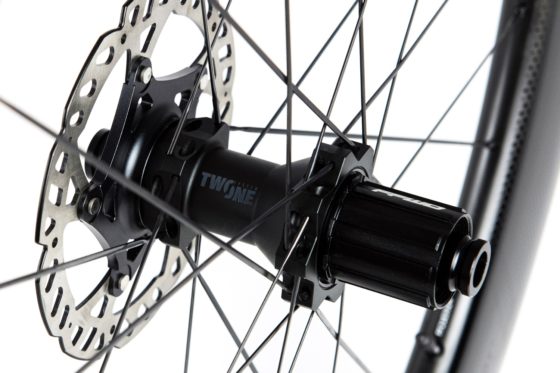
The hub is the middle part of the wheel. What hub you need depends on what built you are going for. This is a very precise tool that helps with the wheel balance, tension and decides what spoke lengths you need for your wheel. Just like the rim, the hub is mostly made by manufactures, and unless you have the machines available to you, not easily made. it is therefore recommended to buy this just like the rim. If you have machines available to you it is possible.
1. The hub is created first with a design, without a design you wouldn’t know how to fit it onto the wheel and what length spokes you need. you need to keep in mind the diameters, hole placing, how smooth the axis will move and how. You need to make sure you have that all axis accurately measured.
2. With the help of some machines and the file and measurements you can begin. load a bar of the material of your choosing into the machine. one or two machines will cut the bar of material into the intended dimensions. leaving you with a material in the shape of your design.
3. The hub now gets transported to a new machine, where the are made holes in the disk like shaped materials, these holes are meant for the spokes and the break rotors. these can be drilled by hand of course but this will require some precision as even the smallest difference in gaps between the holes could cause wheel unbalance. if you decide to do this part by hand make sure you measure the holes first by drawing with a special marker on the material. You also need a good steel drill and a bench vice.
Keep in mind that the amount of holes in the hub and the rim need to match. Other then that you need to keep in mind how big the hub is, the bigger the hub how more likely you are to have spokes attached to the rim in a bigger angle, this is no problem if you have machines that can drill sideways, but it does becomes harder to do by hand.
You can get your hub from any webshop, you can get hubs anywhere you like, just keep in mind the width of the hub so you can have the right set of spokes for your rim.
Making/choosing the material and lengths for the Spokes
Most people buy their spokes from a manufacturer, you can however make you own. Most spokes are made from raw material one-tonne rolls of wire, mostly 1,8 to 2,3 mm thick. The Most common spokes are made of Stainless Steel as they are the most durable and allow for the least amount of angle placement, which means the spoke can be laced in different ways. However there are of course different materials to choose from. I will list the pros and cons from each down below. The Choosing of the spoke should also be carefully considered, check what diameter the holes are of the rim, and what spoke angle you are going to take when lacing. This would give you the needed spoke length between the hub and the rim.
MATERIAL | PROS | CONS |
|---|---|---|
Alluminium alloy | Lighter than steel | Needs to be thicker and more stretched out, which means that its not flexible. |
slightly better stiffness than steel | Fragile because of fatigue | |
Stainless steel | Best strength | Heaviest material |
Best longevity | ||
Carbon fibre | 65% lighter than steel | Expensive |
Higher directional strength | Very brittle breaks easily when impact occurs side ways | |
Higher load capacity of around 450 kg | Difficult to instal as you cannot attach threads | |
The spoke making is not per-say a difficult process but requires a good accuracy with the machines used. There is also a noticeable difference between low end and high end spokes. You will need at least a good set of rollers/straighteners to get a spoke that is not crooked. The following steps are usually made to make a spoke:
1. unwind the stainless steel wires from the one-tonne roll of wires. now cut the wire at the right length that will fit precisely between the hub and the rim. Do notice that all spoke lengths can vary depending on hub, lacing method and rim used. (Lacing method is the way you attach the spokes from hub to rim, this includes the technique used, 2 way or 3 way cross. This is the amount of times the spokes crosses another spoke before reaching the spoke hole in the rim.)
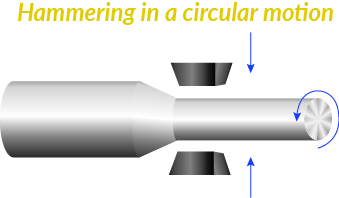
2. You can keep it nice and simple and use a threading machine to make threads on the end of the spoke and bend the in the hub to attach them. However most higher end spokes are also swaged. Swaging is the process of cold forging the spokes to reduce the diameter thickness. Many people assume this is for saving weight, but it actually makes the spokes stronger. Cold forging is almost impossible to do by hand. It involves a Hammering circular motion in quick succession to make the metal denser. for flat bladed spokes you hammer in one motion, not circular.
3. If you haven’t done already so make threads on the end of the spokes with the help of a threading machine. In some cases the rim also supports direct connect with special nipples, you need to check what is possible for your rim. There are some rims that don’t need thread, but thread is the most recommended rim hole type as this is the easiest to instal.
To see what kind of length you need, you can calculate this. Go this section to see how, or you can go for example to a spoke calculator

/ Company
We’re based in Washington D.C. district.
Over 10 sale stores across the US.
Lorem ipsum dolor sit amet consectetur adipiscing elitam blandit placerat nibh vulputate sed non bibendum sem quis conse ctetur mauris hasellus id sollici tudin nibh quisque id lacus molestie feugiat urna sed, bibendum augue quis enim turpis sed iaculis erat vel velit luctus laoreet.
Lorem ipsum dolor sit amet consectetur adipiscing elitam blandit placerat nibh vulputate sed non bibendum sem quis conse ctetur mauris hasellus id sollici tudin nibh quisque id lacus molestie feugiat urna sed, bibendum augue quis enim turpis sed iaculis erat vel velit luctus laoreet.
/ Colleagues For Help

Nel Bins
dolor sit amet consectetur adipiscing elitam blandit placerat nibh vulputate sed non bibendum sem quis conse ctetur mauris hasellus id sollici tudin nibh quisque urna sendum cerat nibh vulp.

Sara Surface
Monolor sit amet consectetur adipiscing elitam blandit placerat nibh vulputate sed non bibendum sem quis conse ctetur mauris hasellus id sollici tudin nibh quisque urna sendum ectetur adipisci.

Virgil Hamilton
dolor sit amet consectetur adipiscing elitam blandit placerat nibh vulputate sed non bibendum sem quis conse ctetur mauris hasellus id sollici tudin nibh quisque urna sendum non bibendum.